CBC-PROC-119 Version 2 last review date: Sep, 2021
1.0 Starting a New Creditor Invoice
1.1. From the Navigation Panel
- Select the ‘Invoices’ menu option.
- Under ‘Invoices’, select the ‘Raise Creditor Invoice’ menu option. The Creditor Invoice Wizard will be launched.
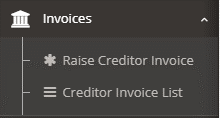
Image: The ‘Raise Creditor Invoice’ button
1.2. From Work Order View
- Expand the ‘Costs’ panel.
- Click the ‘Add Creditor Invoice’ button.
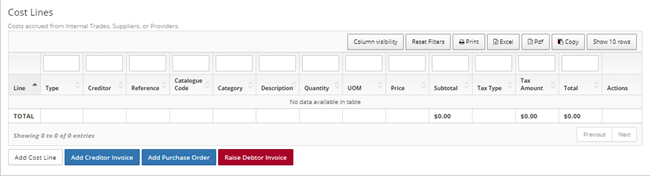
Image: Work Order View – Costs Panel
2.0 The Creditor Invoice Wizard
Step 1 – Enter Invoice details
- ‘Invoice Number’ is a required field and should be populated with the Invoice Number.
- ‘Invoice Date’ should be entered as date the invoice was raised.
- Each Creditor Invoice must be associated with a Work Order. Select the appropriate Work Order from the list. If the Creditor Invoice is raised by clicking the ‘Add Creditor Invoice’ button on a Work Order, the ‘Work Order’ field is pre-populated.
- ‘Invoice Total’ is a required field and should be populated with the total value, including GST, of the Invoice. This will need to match the total value of line items entered in Step 3.
- The ‘Description’ field will default to the description on the selected Work Order.
Step 2 – Attach Documents
Attach relevant documents here including the Invoice and any supporting documentation. Documents already added to the linked Work Order do not need to be added again.
- Drag a file onto the Dropzone.
- Click the edit button and select a Document Type for the added file.
- Adjust the document title if desired. This will pre-populate to the filename of the attached file and doesn’t necessarily need to be changed.
Step 3 – Add Line Items
- Click the ‘Add New’ button to add a line. This will display the Add Line pop-up form. At least one Line Item is required.
- Select a Catalogue Item, or manually enter the details of the item to be purchased.
- Click the ‘Save Changes’ button.
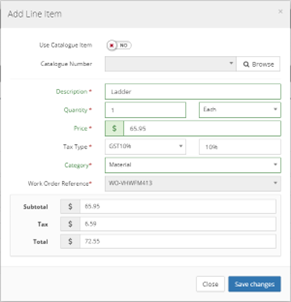
Image: The ‘Add Line Item’ pop-up form
Step 4 – Review
Step 5 – Confirmation
The Creditor Invoice will be created when Step 5 is reached.
3.0 Sending an Invoice for Internal Approval
Once a Creditor Invoice is created, it needs to be reviewed internally to ensure all details are correct and all necessary paperwork has been received.
3.1. Sending the invoice for review
- Open the Creditor Invoice
- From the Invoice Creation Wizard, click the ‘View Creditor Invoice xxxxxxx’ button to navigate to the Invoice view, or
- Utilise the Creditor Invoice List to find an invoice.
- From the Invoice view, click the ‘Approve (Internal) button.
- From the ‘Approve Creditor Invoice (Internal)’ pop up form, enter a comment if applicable.
- If necessary, select an approver from the Approver List.
- An additional approver is required if the value of the invoice is over your delegated limit.
- If the value of the invoice is beneath your limit, selecting an additional approver is optional.
- Click the ‘Confirm Approval’ or ‘Send to Approver’ button, as appropriate.
3.2. Available Approvers
Available approvers are set up in two groups:
3.2.1. My Approvers
This group includes users who have been set up as ‘User Approved By’ on the individual’s User Profile.
3.2.2. CBC Group
Includes users from the contract management team, specifically where:
- Users have any of the ‘Tenant Contract Manager’, ‘Contract Administrator’, ‘Administration Officer’, ‘Facility Coordinator’ roles.
- AND the User is assigned to at least one of the Sites on any of the Work Orders linked to the Invoice.
3.3. Not seeing an expected Approver?
If an approver you need is not appearing, please seek assistance from the Finance Manager or the CMMS Support team.